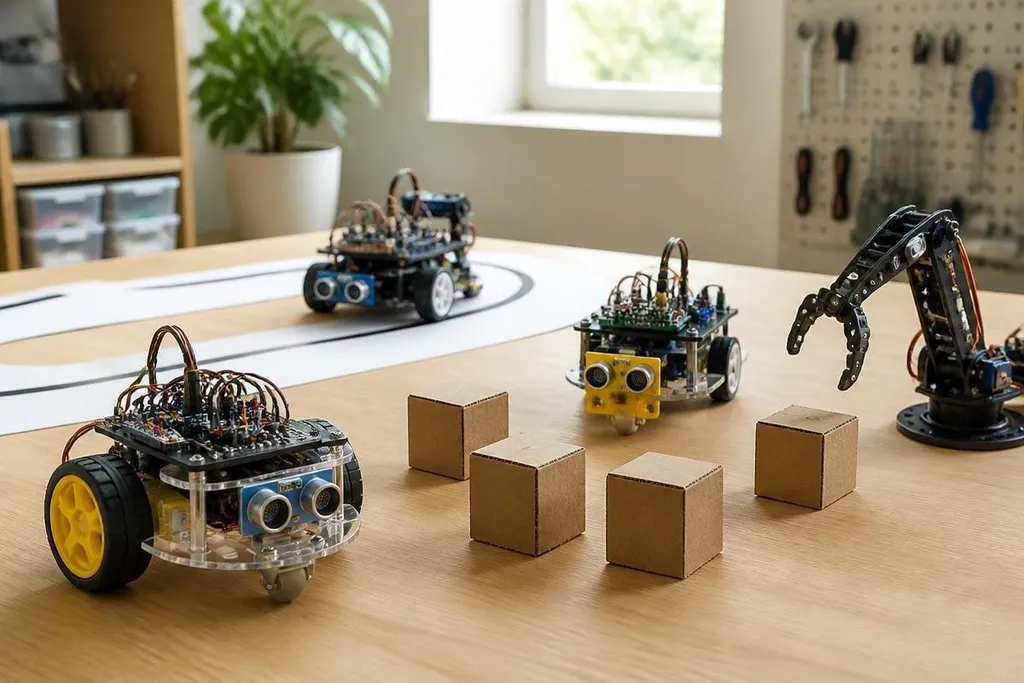
A first robot doesn't need a human-shaped body or a large parts list. A small car that senses a wall, follows a line, or sorts objects can teach the same building blocks used in larger robots.
This guide is for a beginner choosing a first project with limited tools and no past robotics work. Each idea starts with a clear task, then adds one new layer of control.
Quick read
- Start with a two-wheel car if you need a clear first result.
- Pick a line follower to learn sensors and motor control together.
- Build a small arm when you want to study movement, limits, and grip.
Start with a moving base
A two-wheel robot car is a useful first build because every part has a visible job. The motors turn the wheels, a motor driver sends them power, and a microcontroller runs the code.
Begin with manual control from a button, keyboard, or phone. After that works, add a distance sensor so the car can slow down or turn when an object is close. This step teaches input, decision-making, and motor output in one small system.
The main failure comes from treating the car as one finished object. Test each motor on its own, check the wheel direction, and keep the battery supply separate from the controller if the board resets when the motors start.
A basic car also gives you a useful place to learn wiring. You can trace one fault at a time instead of searching through an arm with several moving joints.
Build a line-following robot
A line follower adds a sensor problem to the moving base. Reflective sensors read the difference between a dark line and a lighter surface, then the controller changes motor speed to keep the robot near the line.
Start with one sensor and two actions: move forward or turn. A pair of sensors gives the robot more information, so it can correct its path instead of waiting until the line is far to one side.
The useful lesson is control. The robot must read the surface, compare that reading with a target, and change its motion many times as it moves. Later, you can try proportional control, where the size of the steering change depends on how far the robot has moved from the line.
Lighting, surface color, and sensor height can change the result. Test on the same floor or card used for the project, then record which conditions make the sensor readings shift.
Make a room-sensing rover
A small rover that maps a room with distance readings teaches a different part of robotics. It needs to measure nearby objects, turn without hitting them, and keep track of where it has moved.
You can begin with a distance sensor on a fixed mount. A rotating mount gives readings across a wider angle, but it also adds a servo, timing work, and another place for wiring to fail.
This project introduces autonomous systems without requiring a large robot. The rover still has a narrow task: move through open space while reacting to nearby walls and objects. It won't create a reliable map from a few sensor readings, and that limit matters when you plan the next step.
Your rover can lead to a useful next test: moving an object with a small arm. Robot24.com robotics coverage gives you named machines and control systems to compare with your own project. That comparison can help you choose an arm task with a clear result to measure.
Try a small robotic arm
A desktop arm teaches joints, range of motion, and end-effectors. An end-effector is the part that touches the object, such as a gripper or suction cup.
Start with one rotating joint and a light object. Add a second joint only after the first can move to the same position more than once. Then set software limits so the motor cannot drive the joint beyond its safe range.
A gripper project looks easy in a short video, but the object, grip force, and arm position all matter. A soft block may need less force than a smooth plastic part, while a heavy object can pull the arm off its intended path.
The cost and build time can rise quickly here. A car is the better first choice if your goal is to learn code and wiring before working on mechanics.
Choose a project with this checklist
Use these points before buying parts:
- Define the task: Write one sentence describing what the robot must do.
- Count the moving parts: Fewer motors mean fewer early faults.
- Check the tools: Make sure you have a way to cut, fasten, measure, and test wires.
- Plan the power: Match the battery and motor supply to the controller and driver.
- Set a test point: Decide what working result you need before adding another feature.
- Name the limit: Record what the robot cannot sense, lift, or reach yet.
I'd start with the two-wheel car, then reuse its controller and motor driver for a line follower. That path gives you a working base before sensors and control code make the project harder.
The next useful project is the one that adds one new problem, not five: movement first, sensing next, and a small arm after the first two lessons hold up.